Thursday, November 08, 2007

York Peppermint Pattie Ornaments

images (c) Stampin' Up!, 1990-2007
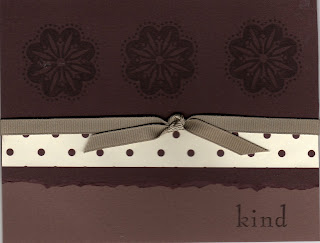
So I saw these little buggers on SCS and I had to make some. I decided to make mine into Christmas ornaments. I took a York Peppermint Pattie and used the scalloped and circle punches to make a front and back for them. Then I tied ribbon around them and voila....Christmas ornaments. I decorated the front and back the same so as not to have to worry about how to hang them or attach them to a package. Super fun and super fast to make. Give them a try!!

Thursday, November 01, 2007

What a Month!!

Wow, this month went by so fast. If you recall, I held a large event on Oct. 6, World Card Making Day, to make cards to donate to the RMH and Hope Lodge, both in Rochester, MN. Well, after all of the sorting and such, I finally delivered all 660 of them today. It is quite a drive, which is why it took so long to coordinate a date to actually go. They were so thankful to receive the cards and it was so nice. It was uber hard work, but so worth it all. Thank you to all who helped out and know that your contribution was appreciated by all.

Wednesday, October 31, 2007

Thank You cards for Grandma...

images (c) Stampin' Up!, 1990-2007
Grandma asked me to make her some thank you cards to send and these are two of the designs I came up with for her. She wants 15 cards in all and I made 5 of each of these...so one more design and 5 cards to go. If the one using Baroque Mofifs looks familiar...it's because I just changed the colors and sentiment of one of my SAS Christmas cards.

Tuesday, October 30, 2007

Autumn Harvest

images (c) Stampin' Up!, 1990-2007
So I received an order for cards this morning and I thought I'd start working on them right away. Of course, I got side-tracked and made this. Very time consuming, but totally fun to make. I wheeled the pumpkin pie cs with the Autumn Leaves wheel from the Holiday collection. I stamped the large pumpkins on naturals white using the masking technique and then water colored with the crayons and an aqua painter. Then, everything else is stamped on naturals white (with black stazon for all), water colored and cut out. It is all layered using glue dots and dimensionals.

Thursday, October 25, 2007

Using my scraps!!!

images (c) Stampin' Up!, 1990-2007
Ok, so I'm organizing my new craft room and I found boxes and bags of scraps. I thought, just for a second of throwing them away, but just couldn't! I have a hard time throwing anything SU! away. So, I vowed to use them...I started last night by creating these two very quick and simple cards. I did not cut ANY full sheets of cs, not even for the card bases. I was so proud of myself. So, this is my mission...to get using those scraps.
Both cards are made with Baroque Motifs.

Tuesday, October 23, 2007

Baroque Christmas

images (c) Stampin' Up!, 1990-2007
I wanted to make a Christmas card with this set for my stamp-a-stack to show how versatile these stamps are. Simple but elegant. It does need some gold brads, but I'm out...the horror!

Crayon Resist Christmas

images (c) Stampin' Up!, 1990-2007
I LOVE this card. The image is totally cased from somewhere, but I cannot remember where I saw it. So, whoever came up with this...thank you so much!! This card is so beautiful IRL. I used the crayon resist technique on glossy cs. First I stamped with stazon, then colored in the snow areas with a plain white crayon. Next, I sponged on classic ink to the image, the white parts showed through, of course. Then, I used a bit of two-way glue and daz. diamonds for a bit of sparkle. The sentiment is also on glossy cs and heat embossed. All of the colored cs is sponged and stippled like crazy. The effect is awesome!

City of David

images (c) Stampin' Up!, 1990-2007
I just love this City of David set. I colored the stamp with water color crayons, misted with water then stamped. I always seem to use earthy tones with this set and make simple cards. I think it goes with the "theme" of the stamps..."a simple gift". Sorry for the crooked scan...no matter how many times I did it, it would not come out straight. The card is straight IRL...LOL!

Wednesday, October 10, 2007

Holiday Harmony Designer Paper fix

images (c) Stampin' Up!, 1990-2007


Ok, so there is this problem with the Holiday Harmony Designer Series Paper (don't worry, SU! will make it right!) and it happens to be on my favorite piece of the paper. So, I sat down tonight and fixed the problem!! On the phrases sheet of the paper the word 'greetings' is spelled wrong and the accent on the word 'noel' (which, of course, I don't even know how to add to my post...LOL) is in the wrong place.

Here's what I did to fix the problem so I can still use these sheets...until I get my new batch, of course. I trimmed the entire sheet of paper into strips where the 'r' should be in all of the 'greetings' words. Then, I stamped 'Merry Christmas' over all of the 'noel' words using the Merry Christmas stamp from the Holidays and Wishes stamp set. Finally, I continued to stamp 'Merry Christmas' on the sheet to even it out. I used rose red craft ink for this. Let me tell you it looks GORGEOUS!! Even better than before. This card is really simple and rather boring, but it shows the fix.

Loads of Love

images (c) Stampin' Up!, 1990-2007
I think this is going to be one of my cards for my next Christmas Stamp Camp. I will only have to change the words on the tag to make it all current. This is using Loads of Love, a set that has not received too much love from me lately. I decided it needed some attention and I really like what I came up with. I stamped the truck on naturals white and water colored with wcc, punched the corners with the ticket corner punch and layered it on kraft cs and paper pierced the corners. Some red gingham and a little tag tied with gold cord completes the focal image. The real red cs is stamped with the linen background and sponged with real red ink around the edges. The artichoke piece is also stamped with linen and sponged around the edges. This piece also has some paper piercing along the bottom. Oh, I almost forgot, the tree is covered in daz. diamonds for snowy sparkle. It is such a cute card!!
Also, I promise the card is straight IRL!!

Snow

images (c) Stampin' Up!, 1990-2007
Ok, there is no way to scan this card well, but I had to share it. I started with Bashful Blue, layered on Night of Navy and then comes the really purty part. I wheeled that awesome snow wheel from the Winter Collection onto glossy cs and blotted dry. Then I stamped those gorgeous trees from Lovely as a Tree in white craft and embossed with white ep. I just received my scalloped punch an snow blossom punch and had to use these too. The snowflake medallion is tied on with the wonderful cord from the winter collection too. This card is absolutely lovely and just may become my Christmas card this year.

Hippie Birthday

images (c) Stampin' Up!, 1990-2007
Well, I'm busy setting up my new craft room and decided to take a break and dust off one of my old favs, Groovy. For the background, I sponged classic ink on glossy cs starting in the middle and working out. I did this with each of four colors, so the middle is just a jumbled mess of color. I stamped the sentiment and flower in craft ink and embossed with clear ep. The scan does not do this card justice. Very fun and easy card. I may have to use this one for a very special friends b-day tomorrow.

Tuesday, October 09, 2007

We did it...250 cards in a day!

Well, my WCMD event was a success. We made 250 cards to donate to the RMH and Hope Lodge!! When I include all of the donated cards, I will have over 600 cards to donate to these two facilities. I hope it helps out all of the deserving folks who are staying there and trying to keep in touch with home.

Thank you to all for your support.
Kaye

Tuesday, October 02, 2007

My TV Interview

Ok, so I think I look and sound totally stupid....but here you go anyway. This is my TV interview to promote my WCMD Event.

http://www.weau.com/news13noonand5/headlines/10181591.html

I tried to load the video so it would play right here, but no luck.

Sunday, September 30, 2007

I'm Back!!

Sorry I have neglected my blog for a while. I have just been so stinkin' busy. I'm putting the finishing touches on my prep for the WCMD event and it is going to be so fun. I have my tv interview in a couple of days and I found out one of the local newspapers is going to be at the event to cover it. Now, I just hope people show up!! I have also been making stuff for a craft fair in October. I also have a bunch of other stuff going on in October.

Then, we are still working on the remodeling of our boys bedroom, so I'm doing all of this crafting in various rooms of my house. I have a table set up in the kitchen and one in the my bedroom. I have craft drawers in almost every room of the house. So, I cannot wait to finish the remodel, cuz then I get my very own craft room!! This should be happening just about the time I'm so busy with all of my events that I won't have time to set it up...of course!

So, I will do my best not to disappear again and keep you updated on the projects I'm working on!!

Oh yeah...today was a great day!!! My wonderful Packers beat the Vikings and they were playing in MN!! Go Pack Go!!!

Tiny Tins

images (c) Stampin' Up!, 1990-2007
These little round tins are just too cute. And talk about easy!! I used the coluzzle to cut the circles...easy peasy! The blue one is so hard to get a good pic of, but it is using the snow designer paper from last year and has lots of daz. diamonds on it. I also put paper on the top and bottom of the insides of these tins. Of course, these are for the craft sale too!!

Altered Tins for Craft Sale

images (c) Stampin' Up!, 1990-2007
Here are some bandaid tins that I have altered that will also be for sale in the craft fair. There's that designer paper and ribbon again!!

My first paint can!!

images (c) Stampin' Up!, 1990-2007
This was a fun project and will be among the items I'm selling at a craft sale in October. Of course it uses some yummy SU! designer paper and ribbon. There are jewels in the centers of the flowers, I found these at Walley World...they were intended to be used to decorate cell phones. They were only $1 and I knew I'd find a use for them.

Tuesday, September 04, 2007

I'm gonna be on TV!!

Wow! My head is swimming right now. I sent out a press release this morning about my World Card Making Day event and less than 1 hour later the local news called me and wants to interview me!! I can't believe it. It is not untill October 2, but I know I'll be a bundle of nerves until then.

Sunday, August 26, 2007

Remodeling

The remodeling in my house has finally begun. We are moving the two boys into what used to be the toy/stamping room and I get what is now their bedroom for my very own!!! But before this all comes together the remodeling must take place. We own a very old house and we have fixed it up room-by-room. So, the sheet rock must all come down and the room must be re-wired....we are a fire waiting to happen with the old wiring. Well, tonight the carpet was taken out and dh is working as I type on removing the old moulding and whatnot. Tomorrow the walls start coming down. I'm so excited! Of course, while this is all going on my house looks like a tornado hit it, but that will all end soon enough.

I'm currently set up, if you can call it that, in the bedroom with most of my supplies and a table...the show must go on when you are in business. I'm trying to figure out how the heck I'm going to get all the work I have to get done before October without it being too painless. I am having my big card making event (see previous post) and I'm in a huge craft sale both in October. AARRGGHH!!! Getting the card event done will be much easier than the craft sale. In addition to finding space to work on the many crafts I want to sell there is also the problem of storing them safely when they are finished. Considering my stamping stuff is now taking up 3 rooms of the house, some in the bedroom (as previously stated), some in the living room and some in the kitchen that doesn't leave much room for craft items. Oh well, it will all work out somehow.

I will post some pics when it is all finished. Whoo Hoo for me!!

Tuesday, August 21, 2007

World Card Making Day Charity Event

Well, just yesterday I decided to hold an event at my church for World Card Making Day on October 6. It is amazing what can take shape in one day! I went from having a little 'ole idea in one morning to a huge undertaking the next...Whoo Hoo for me!

So here is the scoop. I am going to donate my time, expertise (ha, ha), supplies, friend, and what ever else is needed to have huge get together to make cards. These cards will all be donated to the Ronald McDonald House and Hope Lodge, both in Rochester, MN. The families who are using these facilities during their cancer treatments will be able to use these cards to send to loved ones.

Why these two charities? Well, Stampin' Up! is a supporter of the RMHC and has a stamp set that is dedicated to this each year. The Hope Lodge is the place where my father and mother are staying while my father goes through radiation treatment at Mayo Medical Center. I wanted to do something worthwhile with my craft and this seemed like a perfect fit for me. I hope it goes well.

So, how can you help, you ask? Well, I have just the thing. If any of you reading my puny little blog want to donate cards to this cause please leave a comment on this post with your email address and I'll let you know where to send your donation to. I promise that anything you want to help out with will be greatly appreciated!!
Thanks for reading!!
Kaye

Electricity is so wonderful!!

So, last week we were without electricity for 2 days due to a nasty storm. Let me tell you, you sure appreciate the things you take for granted when you do not have them. I felt like Gilligan!! So, now things are back to normal and I'm ready to get blogging again. I'll post some new samples tonight or tomorrow.

Sunday, July 29, 2007

Crabby Christmas

images (c) Stampin' Up!, 1990-2007
I LOVE THIS CARD!! I also love that I created it all by my wittle self!! Crab and Co. is one of my all time favorite sets and I'm so glad it made at least the dormant list. If this card hadn't taken me so darn long to make, I would totally use this design for my Christmas cards this year. But, I would be making them until next year considering I send out around 100 cards.
Ok, so I wheeled kraft paper with Whisper White for the base...it looks so cool!! Then, I stamped all images on Naturals white with Stazon and watercolored with WCC and an aqua painter. Every single cutout has some daz. diamonds on it...very pretty! Now for the photo corners, I do not have the new punch yet so I came up with a way to make my own. I punched the 3/4 inch square from a piece or Real Red and then centered this hole and punched the large square. Then I simply cut two corners from this...easy peasy. I then pierced a bunch of holes in the photo corners and voila.
Ok, so I thought this little Sandy Claws should be doing something, so I made some shell garland with linen thread. I cut around the critters claws a bit and it looks like the little guy is holding the garland. Then, the tag is made from chipboard colored with Real Red craft ink and stamped with Whisper White craft ink. I punched a hole and set a white eyelet in the chipboard with my Crop-a-dile and tied some red gingham through the hole. For the finishing touch I put a bit of Crystal Effects on the eyes to make them look a bit googley (my own word). The whole thing just works and it so cute.
Can you tell that I am a bit of a proud mummy on this one?

Happy Paisley

images (c) Stampin' Up!, 1990-2007
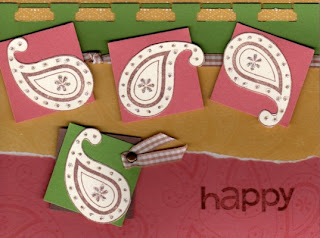
Well, this card is just down right fun! Who doesn't love paisley? Now, it is hard to tell with the scan, but the colors used for this card are Groovy Guava, Wild Wasabi, So Saffron, and Close to Cocoa. Guava is actually the base, but it looks red in the pic. I used So Saffron designer paper. I like doing funky things with the spiral punch, so here I used it on the Wasabi and then threaded a strip of So Saffron designer paper through it. Very cool! You also cannot see it on the scan, but the paisley pieces in the squares are each dotted with daz. diamonds to add a little bling. I hope you like it.

Tuesday, July 24, 2007

I've been tagged!!

Ok, I've been tagged by two wonderful and very talented ladies Sher and Mckenzie. Check out their blogs with the links on the side bar.

List 7 random things about myself:

1. I was married for 12 years before I had children. This was by choice!!
2. I have 2 college degrees.
3. I have seen a million dollars (and it was not very impressive).
4. I love to go to concerts...Rock-n-Roll Baby!!
5. I'm turning 40 this year.
6. I live across the street from my parents and the house where I grew up.
7. I'm addicted to Diet Coke!!

Whew...what a trip

Hello Friends!
I'm officially back from vacation and I couldn't be happier! I love to get away, but I also love to get back home. My kiddos are having a good time today playing with their friends and I'm just relaxing. My nieces wedding was absolutely beautiful and I shed so many tears of joy for her and her new husband. I can't believe all of the planning of each little detail that went into this production. Nothing was forgotten and everything was perfect! My oldest little man was in charge of handing out the programs and he did a wonderful job. Both of the kiddos danced the night away and slept like angels that night. They were just plain tuckered out. It was good to spend the time with family and connect with many who I haven't seen in years. I'm hoping to get some stamping done soon and I'll get some new posts up in a day or two.
Kaye

Tuesday, July 17, 2007

Off to Texas

Well, my friends, I'll be off for a few days. We are going to Texas for my niece's wedding. I'll miss you and be sure to check in when I get back!!
Kaye

Friday, July 13, 2007

Sparkle Chipboard

images (c) Stampin' Up!, 1990-2007

This was fun to make and quite easy. I'm really gettin' into this chipboard and having a great time experimenting with it. For the large star, I covered the chipboard with Rose Red designer paper, versa marked the whole image and embossed with clear embossing powder mixed with Dazzling Diamonds. The three small stars are covered with Rose Red craft ink and embossed with clear embossing powder. The stamps used are from the Double Line Doodle and Warm Words sets.

Pick a Petal

images (c) Stampin' Up!, 1990-2007
Ok, sorry for the crooked scan. This card is so lumpy, it is the best I can do. I love this card and am very happy with it. Pick a Petal is one of those sets that has a significant learning curve attached to it, but once you "get it", it is so fun to use. For this card, I stamped on the beautiful designer paper in versa mark and embossed in clear, then cut out the petals around the embossing. I did the same for the center circle. Then, I punched all the holes for the brad and assembled my flower. Now for the strip on the bottom...that just makes this card so yummy...I paper pierced the top and bottom and then punched the holes. For all of this piercing and punching, I used the very useful mat pack for proper placement...a must if you ask me! The card base is wheeled with the Petals wheel and the Celery piece is stamped with the linen background stamp. More designer paper is used for the tag and the HB is also embossed. Finally, the ribbon is apricot.

Monkey Business!!

images (c) Stampin' Up!, 1990-2007
This was a fun card to make and My mom sent it too my Great Nephew for his 1st birthday. I think this Monkey is the best and cannot wait to make more stuff with it!! I'm experimenting lately with different color combos and this one is certainly new for me. To mix so many colors is very out of the box, but I'm liking it A LOT!!!

Happy Fall!!

images (c) Stampin' Up!, 1990-2007
Isn't this a fun card? I just love how it turned out. There I go paper piercing again...Love it! Now the circles with the ribbon are made by first punching the double rectangle then centering this in the 3/4 inch circle punch, then of course thread the ribbon through each one. I gotta tell ya too, this works so much better than the actual punch I have that is made to do this very thing. The punch never punches the paper out completely and it always gets ruined! I'm getting rid of those punches and doing it this way from now on. Now the tree on this card is made by inking up in Creamy Caramel and then tapping the stamp on the Chocolate Chip pad quickly. I love this effect, especially for this particular stamp, give it a try....you will like it!!

HB Flowers

images (c) Stampin' Up!, 1990-2007
Ok I am sooooooo happy that all the Polka Dots and ..... made it into the catty and the matching designer paper too!!! How cool is that? Ok, this scan totally stinks, but here's the scoop. The Rose Red card base is wheeled with the Petals wheel using Rose Red classic ink. I am loving all of the new designer paper and this card features the Certainly Celery and Rose Red tied with Certainly Celery ribbon. Now who can get enough of our new punches? Well, not me!! The tab punch and spiral punch are so cool, that I have to stop myself from using them or all my cards will look the same...LOL! I cannot wait to get the new punches from the catty, esp. the photo corners punch....YUM!

Baroque Cherish

images (c) Stampin' Up!, 1990-2007
This could be my most favorite card EVER!! I am very proud of it and I hope you like it too. It is hard to see, but the Night of Navy piece is paper pierced and it looks so cool. this is one of my favorite techniques as of late. The swirls on the Close to Cocoa piece, the flowers and Cherish are all embossed using Craft ink and clear embossing powder. Also hard to see, behind Cherish I stamped the swirls in Blush Blossom (stamped off a couple of times). This really ties the sentiment piece into the rest of the swirly card.

Belly Band

images (c) Stampin' Up!, 1990-2007
This is my first attempt at a card with a belly band. Very fun and easy. Of course it doesn't hurt that the sets are awesome too!! I just love the new catty and all it has to offer. I'll tell ya, I would never have chosen Baroque Motifs normally, but I went for it and I'm soooooo glad I did. I had trouble with it at first, but now I'm absolutely LOVIN' it! It is so easy to work with and makes the most lovely cards. More to come with this set!!

Monday, May 21, 2007

You ARRR Invited

images (c) Stampin' Up!, 1990-2007


This is one of my favorite cards ever. I made it for my son's second birthday and I just love it. I wheeled the map on watercolor paper and water colored with classic ink or watercolor crayon...my brain is old and it was a long time ago...and an aqua painter. The coins are punched circles colored with a gold leafing pen. The tag is faux metal also made by coloring the larger circle with a gold leafing pen.

Tuesday, May 15, 2007

Just Because

images (c) Stampin' Up!, 1990-2007
Isn't Looks Like Spring just the best?! The technique used on this is emboss resist and I think it turned out kinda purty. Craft ink is used to make the flowers on the base and the sentiment comes from Fancy Flexible Phrases...I sooooo hope this set makes the new catty!

A Little Pickup

images (c) Stampin' Up!, 1990-2007
This card starts out with Sahara Sand cs stamped with Canvas and Crosshatch, I added some designer paper (imagine that), the image is water colored using those wonderful crayons and an aqua painter, hmmmm...the round tab punch shows up again and a bunch of ribbon. This was a fun card to make. Loads of Love is a great set...you can do so much with it!!

Wedding card for the season

images (c) Stampin' Up!, 1990-2007
This is my wedding card I'm using for the couple of weddings I am attending this summer.

Graduation card for the girlies

images (c) Stampin' Up!, 1990-2007
Here is the graduation card I created for all the girlies graduating in my life this year. This is my favorite card right now!! I used the scrapbook paper from the current hostess scrappin' kit and a sell-a-bration set to create this. Of course the background is stamped with print pattern. I paper pierced the celery cs and used watercolor crayons and an aqua painter on the flower. And...there's that Round Tab punch I love so much. I really do love this card!!

Graduation card for the guys

images (c) Stampin' Up!, 1990-2007

This is the graduation card I created for all the guys graduating in my life this year. The scan is awful...my scanner hates me! But it uses Rose Red cardstock stamped with Linen, Au Chocolate designer paper, So Saffron and Chocolate Chip cardstock, Cream Grosgrain ribbon and Lovely as a Tree. It really is nice in person, trust me!! Oh and the word is Congratulations, in case you couldn't guess ;)...It isn't stamped blurry either!!


Lovely as a Tree

images (c) Stampin' Up!, 1990-2007

This is a card using the Lovely as a Tree set, which is so versatile. I use it all the time. I hope it never retires. My scanner today is not cooperating, so it is hard to tell, but the colors are Cranberry Crisp, Vintage Violet and Blush Blossom (a personal fav). I Stamped with Bravo Burgundy (stamped off once). The chipboard piece is covered in Blush Blossom Craft Ink and then the trees are stamped on with Bravo Burgundy. After this had all dried, I covered in versa mark ink and embossed with clear ep. I also used the Spiral Punch and threaded cranberry stitched ribbon through the slots.

images (c) Stampin' Up!, 1990-2007

This is the scrapbook page I did for my last workshop. It was so quick and easy using all of the yummy Polka Dots and Petals merchandise. I'm in love with all of it. Have I mentioned that I love SU! designer paper? LOL! Well, I do and I can't seem to create anything these days without it. This page also uses the Round Tab Punch and the Spiral Punch, both of which are in the Spring Mini Catalog. These too, I love!

Hmmm....I'm kind of in a LOVE mood today, huh?!


Monday, April 30, 2007

Ok, I have been tagged by Gina and I have to list 7 things about myself. So here goes...

  1. I have actually seen 1 million dollars.
  2. I have two college degrees. One in Early Childhood Education and one in Psychology.
  3. I met my hubby at a Rollerskating Rink when I was 15 years old. We have been together ever since. We got married when I was 21 and began our family when I was 33.
  4. I will turn 40 in August and I'm not too thrilled!!
  5. I love to gamble, but stink at it!!
  6. I go by the name Rock Fest Queen, cuz that's what I am. We go to a music festival each summer called Rock Fest and I am the self-proclaimed Queen of the Fest. I'm not tellin' why...what happens at Rock Fest, stays at Rock Fest!!
  7. I am totally color challenged!! If I didn't have Stampin' Up, I don't know what I would do!!


Unfortuately, I don't really have anyone to tag...but I'll keep looking.

Bugs and Kisses


Ok, the Bugs and Kisses set is just too cute for words. I have had it since January and I can't get enough of it. Who knew bugs could bring me such happiness?

Cracked Glass

images (c) Stampin' Up!, 1990-2007

This card uses the cracked glass technique which is so much fun. When I taught this to my club members they went ga-ga over it and we all had a super time. I used organdy and grograin ribbon tied together. I really like doing this (even though it can be a pain) cuz it looks so purty!


Friday, April 20, 2007

Polka Dots and Paisley

images (c) Stampin' Up!, 1990-2007
For this card I used the set Polka Dots and Paisley and the Petals and Paisleys designer paper. The circles are chipboard from the On Board Accents. First I covered them with white craft ink, then stamped and sponged around the outside. After this was dry, I think I helped this along with the heat tool, I covered with versamark and embossed with clear ep. The scan does not do the card justice, it is so beautiful in person!!

Happy Camper

images (c) Stampin' Up!, 1990-2007
I just love this Happy Camper set. It is so darn cute. I had a lot of fun making this card. The sign, boot and weenie on a stick are popped up. I used some of the Spring Showers Designer Series Double-Sided paper from SU! I addicted to these designer papers from SU! They are just beautiful and they make creating cards a breeze.

Tuesday, April 10, 2007

A bit about me...

Hi, My name is Kaye and I am a Stampin' Up! demonstrator/junkie. Ok, I've gotten that off my chest, now what else can I say? I'm a stay-at-home mom with two beautiful boys. I've been married for 18 years and I love the Green Bay Packers. I became a Stampin' Up! demonstrator in May of 2005 and have been a stamper since very shortly before that.

I am starting this blog to keep in touch with my friends, customers and anyone else who may be interested. I want to let you all see what I'm working on and hopfully inspire you to get those stamps out and start stampin'!

Thanks for checking it out!
Kaye